How to Clean Car Seats: A Practical DIY Guide

Before grabbing cleaners and cloths, start with this crucial first step: vacuum everything. Get rid of loose crumbs, dust, and pet hair. Next, identify your seat material—cloth, leather, or vinyl—to choose the right cleaner. Gently scrub, then wipe the surface clean.
The golden rule is to avoid soaking the fabric. And I can't stress this enough: always test any cleaning solution on a small, hidden spot first. This simple check prevents costly damage.
Why a Clean Interior Matters More Than You Think
A clean car interior provides more than just aesthetic appeal; it directly impacts your health, driving experience, and the vehicle's resale value.
Daily use leads to spills and crumbs that seep into seat cushions, creating a breeding ground for germs and allergens. This can negatively affect the air quality inside your vehicle.
Maintaining clean seats is a smart investment. A pristine interior can significantly boost your car's value when it's time to sell or trade it in. Moreover, a fresh-smelling, sharp-looking cabin makes every drive, from the daily commute to a long road trip, more pleasant and less stressful.
The Real Cost of Neglect
Delaying cleaning allows stains to set permanently and lets abrasive dirt wear down fabric fibers over time. Professional detailing is an option, but it comes at a price.
The global market for car cleaning products hit a staggering $14.78 billion in 2024, and it's expected to grow, which shows how much owners value vehicle maintenance. You can explore more insights into the car cleaning market here.
This guide provides actionable, real-world methods to achieve professional-level results without the high cost of a detailer.
Key Takeaway: Regular cleaning prevents the buildup of dirt and oils that can permanently damage upholstery, preserving both the comfort and financial value of your car.
With the right techniques, you can confidently tackle anything from a fresh spill to deep-set grime. I'll show you how to identify your seat material—durable cloth, classic leather, or practical vinyl—and apply the correct cleaning method. It's time to stop guessing and start restoring your car's interior.
Preparing Your Seats for a Deep Clean
Before applying any cleaner, proper prep work is essential. Skipping this step and scrubbing directly over loose debris will create a muddy, smeared mess. Taking a few minutes to prepare the surface ensures a professional-level result and makes the entire job easier.
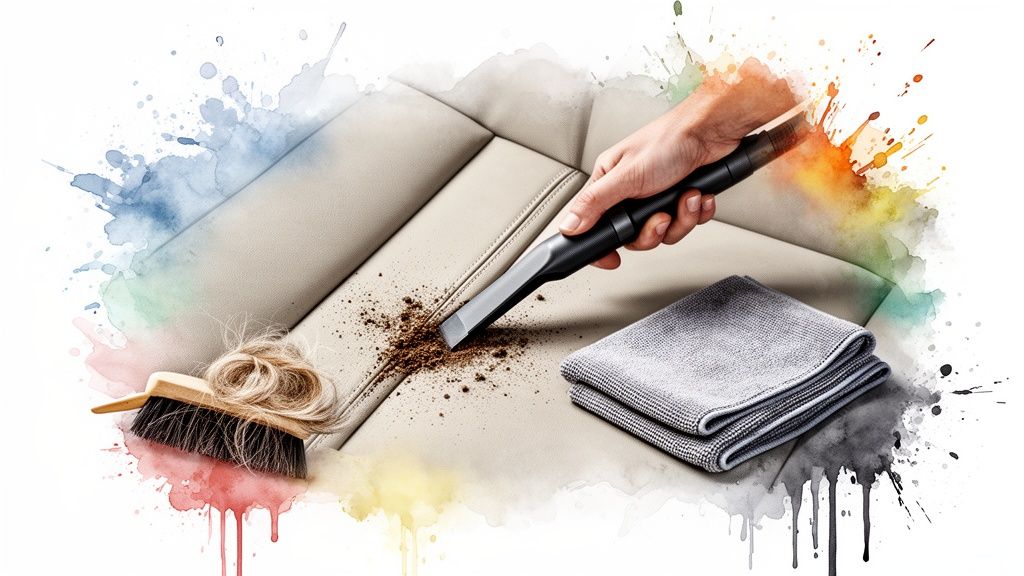
The first and most critical action is to vacuum your seats thoroughly. This isn't a quick once-over; your goal is to remove every bit of dirt, sand, pet hair, and food crumbs.
Your Vacuuming Strategy
To access hidden debris, slide the front seats all the way forward, then all the way back. Use your vacuum's attachments for a detailed clean.
- The Crevice Tool: Use this long, narrow tool to reach deep into seams, between the seats and center console, and along plastic trim where gunk collects.
- The Brush Head: For fabric seats, attach the brush head and scrub the upholstery as you vacuum. This action agitates and loosens stubborn pet hair and ground-in dirt from the fibers.
Take your time with this step. A thoroughly vacuumed car is the foundation for a deep clean. For more ideas, some of the best cleaning tools for your home can be equally effective in your vehicle.
Pro Tip: To easily remove stubborn pet hair, lightly mist the fabric with water. Then, put on a rubber dish glove and wipe your hand across the seat. The hair will ball up, making it simple to vacuum away.
Pre-Treating and Spot-Testing
After vacuuming, identify any noticeable stains. Apply a small amount of your cleaning solution directly onto these spots 10-15 minutes before you begin the main cleaning. This gives the cleaner extra time to break down the stain.
Finally, perform a spot test. This is non-negotiable. Find a hidden area, like the underside of a seat or a low corner on the back, and apply a tiny amount of cleaner. Let it sit for a few minutes, then blot it with a clean, white cloth. If any color transfers to the cloth or the fabric changes appearance, stop and choose a different cleaner. This one check can save you from a major mishap.
A Practical Guide to Cleaning Fabric Seats
Cloth seats are comfortable and durable, but they act as magnets for dirt, spills, and pet hair.
The key to cleaning them effectively is to be thorough without oversaturating the underlying foam, which can lead to musty smells and mildew. Here’s the step-by-step process to get them looking fresh again.
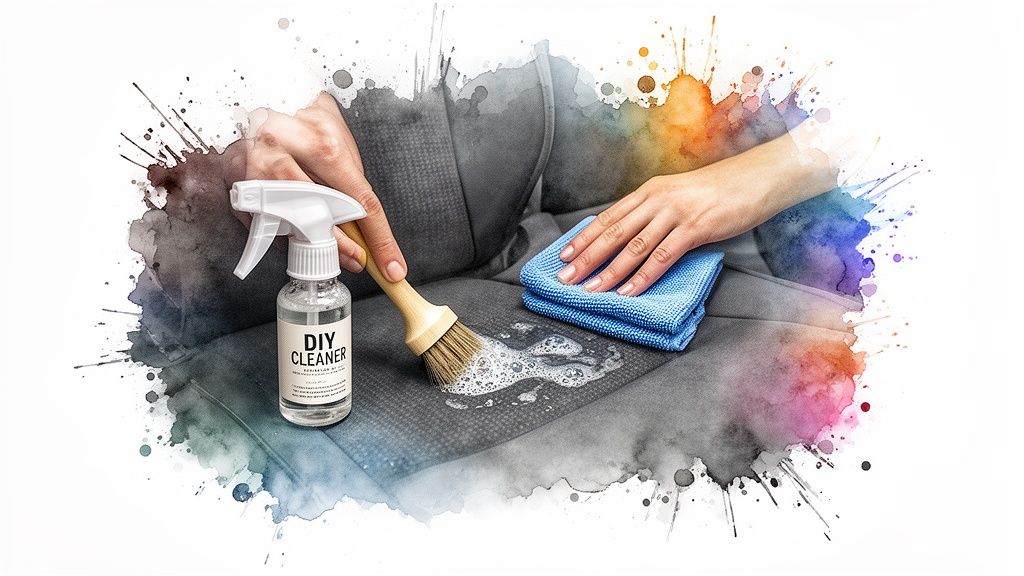
Your Go-To DIY Cleaning Solution
For most light to moderate grime, a simple homemade cleaner is highly effective and uses ingredients you likely already have.
Follow this recipe for a gentle yet powerful fabric cleaner. In a spray bottle, combine:
- One cup of white vinegar
- One cup of warm water
- A few drops of mild dish soap
Shake gently to mix. The vinegar helps lift stains and neutralize odors, while the dish soap breaks down oils and grime. Use only a few drops of soap to avoid a sticky residue that attracts more dirt.
To begin, lightly mist the fabric, aiming for damp, not drenched. Work in small, manageable sections, such as one seat cushion at a time, to prevent the cleaner from drying before you can work it in. For persistent pet hair, using a tool like the Quick-Swipe Pet Hair Roller after cleaning can be very effective, as the moisture helps release stubborn fur.
For more options, here are a few simple recipes you can make at home.
Table: DIY Fabric Seat Cleaner Recipes
This quick-reference guide provides several safe and effective homemade cleaning solutions for cloth car seats. Always perform a spot test in a hidden area first.
| Cleaner Type | Ingredients | Best For |
|---|---|---|
| All-Purpose Cleaner | 1 part white vinegar, 1 part warm water, dash of dish soap | General dirt, light stains, and deodorizing. |
| Gentle Degreaser | 2 cups warm water, 1 tbsp baking soda, 1 tbsp dish soap | Oily stains from food or sunscreen. |
| Odor Buster | 2 cups warm water, ¼ cup white vinegar, 1 tbsp fabric softener | Refreshing stale smells and light cleaning. |
These simple mixtures prove you don't need harsh chemicals to get a deep clean.
Proper Agitation And Blotting Technique
Once you've applied the cleaner, it's time to agitate the fabric to lift embedded dirt from the weave.
Using a soft-bristled interior brush, gently scrub the dampened area in small, overlapping circles until a light foam appears. This indicates the cleaner is working deep into the fibers to loosen ground-in dirt left behind by the vacuum. A new, clean scrub brush with soft bristles is a good substitute if you don't have a dedicated interior brush.
Next, take a clean, dry microfiber towel and blot the area—do not rub. Press the towel firmly into the fabric to absorb the cleaning solution and the lifted grime. As the towel becomes soiled, fold it to a clean section and continue blotting. Repeat until the area is nearly dry and the towel is no longer picking up dirt.
Crucial Tip: Always blot. Rubbing can damage fabric fibers and push stains deeper into the cushion. Blotting effectively lifts the dirt out of the seat.
Ensuring A Dry And Fresh Finish
The final step is to ensure the seats dry completely to prevent mildew and musty odors.
On a sunny day, park your car with the doors or windows open to promote air circulation. On a cloudy day or for faster drying, place a fan inside the car aimed at the seats.
Resist the temptation to sit on the seats until they are 100% dry to the touch. This process may take a few hours, but your patience will result in seats that look great and a car that smells genuinely clean.
Tackling Leather and Vinyl Seats the Right Way
Leather and vinyl interiors require specific care. Unlike absorbent cloth, these materials are susceptible to surface damage like cracking, fading, and staining from harsh chemicals. The proper technique involves gentle cleaning to remove dirt while preserving the material's natural finish.
Avoid using all-purpose cleaners or simple soap and water. These products are often too alkaline and can dry out leather and vinyl, making them brittle. Use a pH-neutral cleaner specifically designed for these materials to lift dirt without stripping the finish.
The Pro's Two-Bucket Method
To avoid spreading dirt around, use the two-bucket method favored by professional detailers. This simple technique dramatically improves your results.
- Bucket One: Fill with your diluted, pH-neutral cleaning solution.
- Bucket Two: Fill with clean rinse water.
Here’s the process: Dip a soft-bristled brush or microfiber towel into the cleaning solution and gently scrub a small section of the seat. Before getting more cleaner, rinse the dirty brush or towel in the clean water bucket. This ensures you are always applying fresh cleaner and lifting grime away, not just moving it around.
Expert Insight: Work in small, manageable sections, like a single headrest or seat bolster. This prevents the cleaning solution from drying on the surface, which causes streaks and blotches.
Conditioning Is Not Optional
Cleaning is only half the job. After the seats are clean and fully dry, you must apply a conditioner. A quality leather conditioner replenishes the essential oils removed during cleaning, keeping the material soft, flexible, and protected from UV rays that cause cracking and fading.
Think of it as moisturizing your skin. Skipping this step will cause the leather to dry out, stiffen, and eventually crack. For vinyl, a conditioner with UV protectants is equally important, as it prevents plasticizers from breaking down and making the material hard and brittle.
To apply, put a dime-sized amount of conditioner onto a microfiber applicator pad. Work it into the leather or vinyl using small, overlapping circles to create a thin, even coat. Let the conditioner penetrate for about 15-20 minutes. Then, use a separate, clean microfiber towel to lightly buff the entire seat, removing any excess product.
This final buff creates a rich, satin finish without a sticky or greasy residue. To speed up drying after cleaning, a tool like the Turbo Power Handheld Blower is useful for forcing air into seams and perforations before you apply conditioner.
The market reflects a growing commitment to interior care. The global car seat cleaning kits market was valued at around $1.2 billion in 2024 and is projected to nearly double by 2033, showing that owners recognize the value of proper maintenance. You can read the full research about the car seat cleaning market here.
How to Remove Tough Stains and Odors
Sometimes, a general cleaning isn't enough for stubborn messes like melted crayon, a leaky pen, or a lingering takeout smell. For these challenges, you need to shift from general cleaning to targeted stain and odor removal.
Different problems require specific solutions. For example, to tackle a greasy food stain on a cloth seat, make a paste of cornstarch and water. Apply it to the grease spot, let it dry completely, then vacuum it up. The cornstarch is highly effective at absorbing and lifting oil from fabric fibers.
Tackling Specific Stains
Different stains require unique treatments because a universal cleaner often can't break down specific compounds like ink or coffee tannins.
Here is a quick action plan for common stubborn stains:
- Ink Stains: For ballpoint pen ink, dampen a cotton ball with rubbing alcohol. Gently dab the spot, lifting the ink without rubbing it in.
- Melted Crayon: First, harden the wax with a bag of ice. Once brittle, carefully scrape off the excess pieces. Place a paper bag over the remaining stain and press it with an iron on a low setting. The paper will absorb the melted wax.
- Coffee Spills: Neutralize coffee stains by gently blotting the area with a diluted solution of white vinegar and water. Remember to blot, not scrub, to lift the stain out of the fibers.
This flowchart provides a simple visual guide for the process of maintaining leather and vinyl seats.
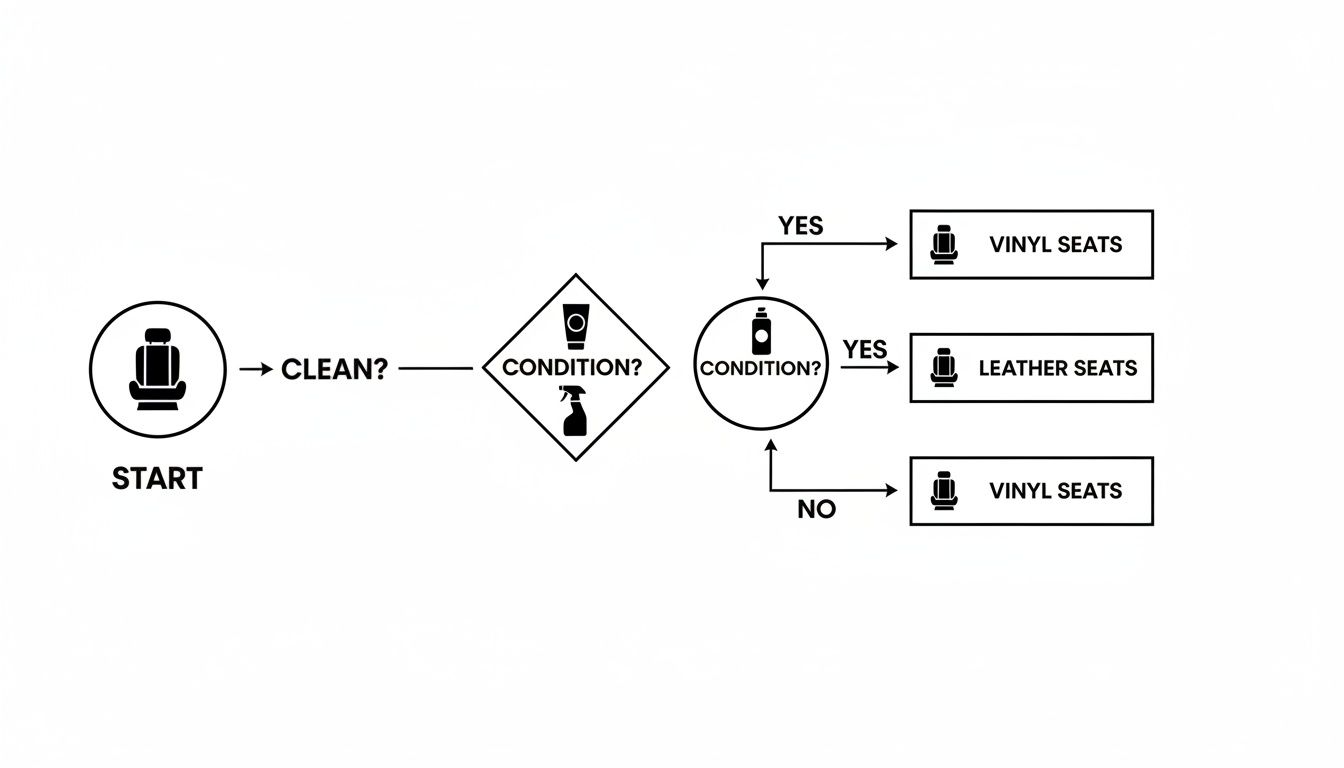
As shown, cleaning and conditioning are two separate but equally vital steps for these materials.
Eliminating Odors at the Source
Masking odors with an air freshener is a temporary fix. To permanently eliminate a smell, you must remove its source.
Key Insight: Most persistent car odors are caused by bacteria feeding on organic particles from spills, smoke, or pets. The goal is to eliminate the source, not just cover the scent.
For dry seats, sprinkle baking soda generously across the surface. Let it sit for several hours or overnight for tough odors, then vacuum it thoroughly.
To combat stubborn musty or smoke smells, lightly mist the seats with a 50/50 solution of white vinegar and water. The vinegar neutralizes odor-causing bacteria. The vinegar smell will dissipate completely as it dries.
The demand for effective, non-toxic cleaners is growing. The baby-safe car seat cleaner market was valued at $1.2 billion in 2024 and is expected to continue climbing, highlighting the demand for safe, powerful cleaning solutions. You can discover more insights about the baby-safe cleaner market here.
Car Seat Cleaning Questions Answered
Even with the basics covered, specific questions often arise. Having the right answers can prevent a costly mistake. Here are clarifications on the most common car seat cleaning queries.
A frequent question is, "How often should I clean my car seats?" For a daily driver, a quick vacuum and wipe-down every few weeks is a good habit. Plan to perform a deep clean, as detailed in this guide, two to three times per year to prevent deep-set grime from accumulating.
If you have kids, pets, or frequently eat in your car, you'll need to address messes more often. Consistent upkeep is far easier than tackling a major cleaning overhaul.
Is Steam Cleaning a Good Idea for Car Seats?
Yes, steam cleaning is an excellent method, especially for fabric seats. Steam uses hot vapor to break down tough stains and sanitize surfaces without leaving chemical residue. It is both powerful and gentle on most cloth upholstery.
For leather, however, you must be cautious. Direct, high-temperature steam can strip natural oils, leading to dryness and cracking. If using steam on leather, wrap the nozzle in a thick microfiber towel to diffuse the heat. Immediately afterward, apply a quality leather conditioner to replenish moisture.
Key Takeaway: Steam is highly effective for deep cleaning and sanitizing fabric. For leather, use an indirect, gentle approach and always recondition the material immediately after.
Protecting Your Seats After Cleaning
After cleaning, the next step is protection to maintain the fresh look. A few preventative measures can save you significant effort later.
- For Fabric Seats: Apply a quality fabric guard spray. This creates an invisible barrier that causes liquids to bead up on the surface, giving you time to blot spills before they set.
- For Leather and Vinyl: Regular conditioning is the best protection. Apply a conditioner every 3-4 months to keep the material soft, prevent cracking, and shield it from damaging UV rays.
Can I Use Household Cleaners on My Car Seats?
Avoid using household cleaners on your car's interior. Most all-purpose sprays are too harsh and contain aggressive chemicals with the wrong pH balance, which can damage upholstery.
For example, dish soap can strip oils from leather, and a strong degreaser may cause fabric colors to fade. Stick with a simple DIY solution like diluted white vinegar or, even better, a product specifically formulated for automotive interiors. Your car seats will last longer and look better as a result.
Keeping your car's interior looking and smelling fresh doesn't have to be a battle. With the right accessories from JonkeyCart, you can handle any mess with confidence and maintain that new-car feel.
Explore our full range of smart car care accessories at JonkeyCart.com


Leave a comment