How to Organize Garage Tools for a Clutter-Free Workshop

To organize your garage tools, follow a simple, actionable plan: first, take stock of everything you have and ruthlessly declutter. Once you know what you're keeping, sort the tools into logical groups based on how you use them. Only then should you plan a layout with dedicated zones and install storage solutions.
This "system before storage" approach is the secret to turning a chaotic mess into a workshop that actually works.
Your Blueprint for an Efficient Garage Workspace
Imagine walking into your garage and grabbing the exact tool you need in seconds. No digging, no searching, no frustration. This guide provides a step-by-step roadmap to make that a reality. We will break down how to organize garage tools into manageable, actionable steps—no overwhelming weekend overhaul required.
This isn't just about cleaning up. It’s about creating a space that makes your projects easier, faster, and safer. A well-organized garage cuts down on project time and makes your DIY hobbies far more enjoyable.
Before we dive in, here’s a quick overview of the entire process so you know exactly where we're headed.
| Phase | Key Action | Main Benefit |
|---|---|---|
| 1. Assess & Declutter | Empty your space and decide what to keep, toss, or donate. | Creates a clean slate and ensures you only organize what you need. |
| 2. Sort & Categorize | Group similar tools together (e.g., all wrenches, all power tools). | Makes finding everything easy and informs your storage choices. |
| 3. Plan Your Zones | Designate specific areas for different activities (e.g., woodworking, auto repair). | Keeps related tools and materials together for a smooth workflow. |
| 4. Install Storage | Choose and set up pegboards, cabinets, racks, and other solutions. | Gets tools off the floor and gives everything a permanent home. |
| 5. Label & Inventory | Clearly label every bin, drawer, and shelf. | Eliminates guesswork and makes finding and returning tools effortless. |
| 6. Maintain & Stay Safe | Implement a routine for tidying up and follow safety best practices. | Keeps your garage functional and prevents future clutter and accidents. |
This table provides a bird's-eye view of our strategy. With this framework, the rest of the steps will fall into place much more easily.
Why a System Matters First
A common mistake is rushing out to buy bins and racks before knowing what needs to be stored. That’s a recipe for wasted money and a system that doesn't actually work. An effective organization plan is built on these core principles:
- Visibility and Access: Place the tools you use most often where they are easiest to see and grab.
- Logical Grouping: Store items by project type (automotive, plumbing, woodworking) to stop you from hunting through the garage for one job.
- Space Maximization: Get things off the floor. Use your vertical wall space and overhead areas to dramatically increase storage capacity.
This strategic thinking pays off. The global booming garage organization market has grown to USD 25.14 billion because homeowners realize a tidy space is a smart investment. A well-organized garage can slash tool search time by up to 50% and can even boost your home's resale value.
A truly organized garage isn’t just clean—it's intuitive. Every tool has a home, and that home is exactly where you’d expect it to be, making your workflow seamless.
Don't forget about lighting; it's a critical part of a functional and safe workshop. Adding a simple motion-activated portable night light can illuminate dark corners and cabinets, helping you find small parts without fumbling for a switch. This guide will set you up for success, giving you the confidence to get started and see the project through.
Sorting Your Tools: Time to Get Brutal
This is where the real work begins. Before designing the perfect storage system, you must know exactly what you’re working with. Action Step: Pull everything—every single tool, screw, and piece of equipment—out into the open.
The sight of every tool you own spread across the floor can feel overwhelming, but it’s a crucial first step. It's no wonder that surveys show 68% of homeowners point to garage clutter as a major source of stress. This is your chance to take back control. The garage organization and storage system industry has grown significantly as more people seek to reclaim these spaces.
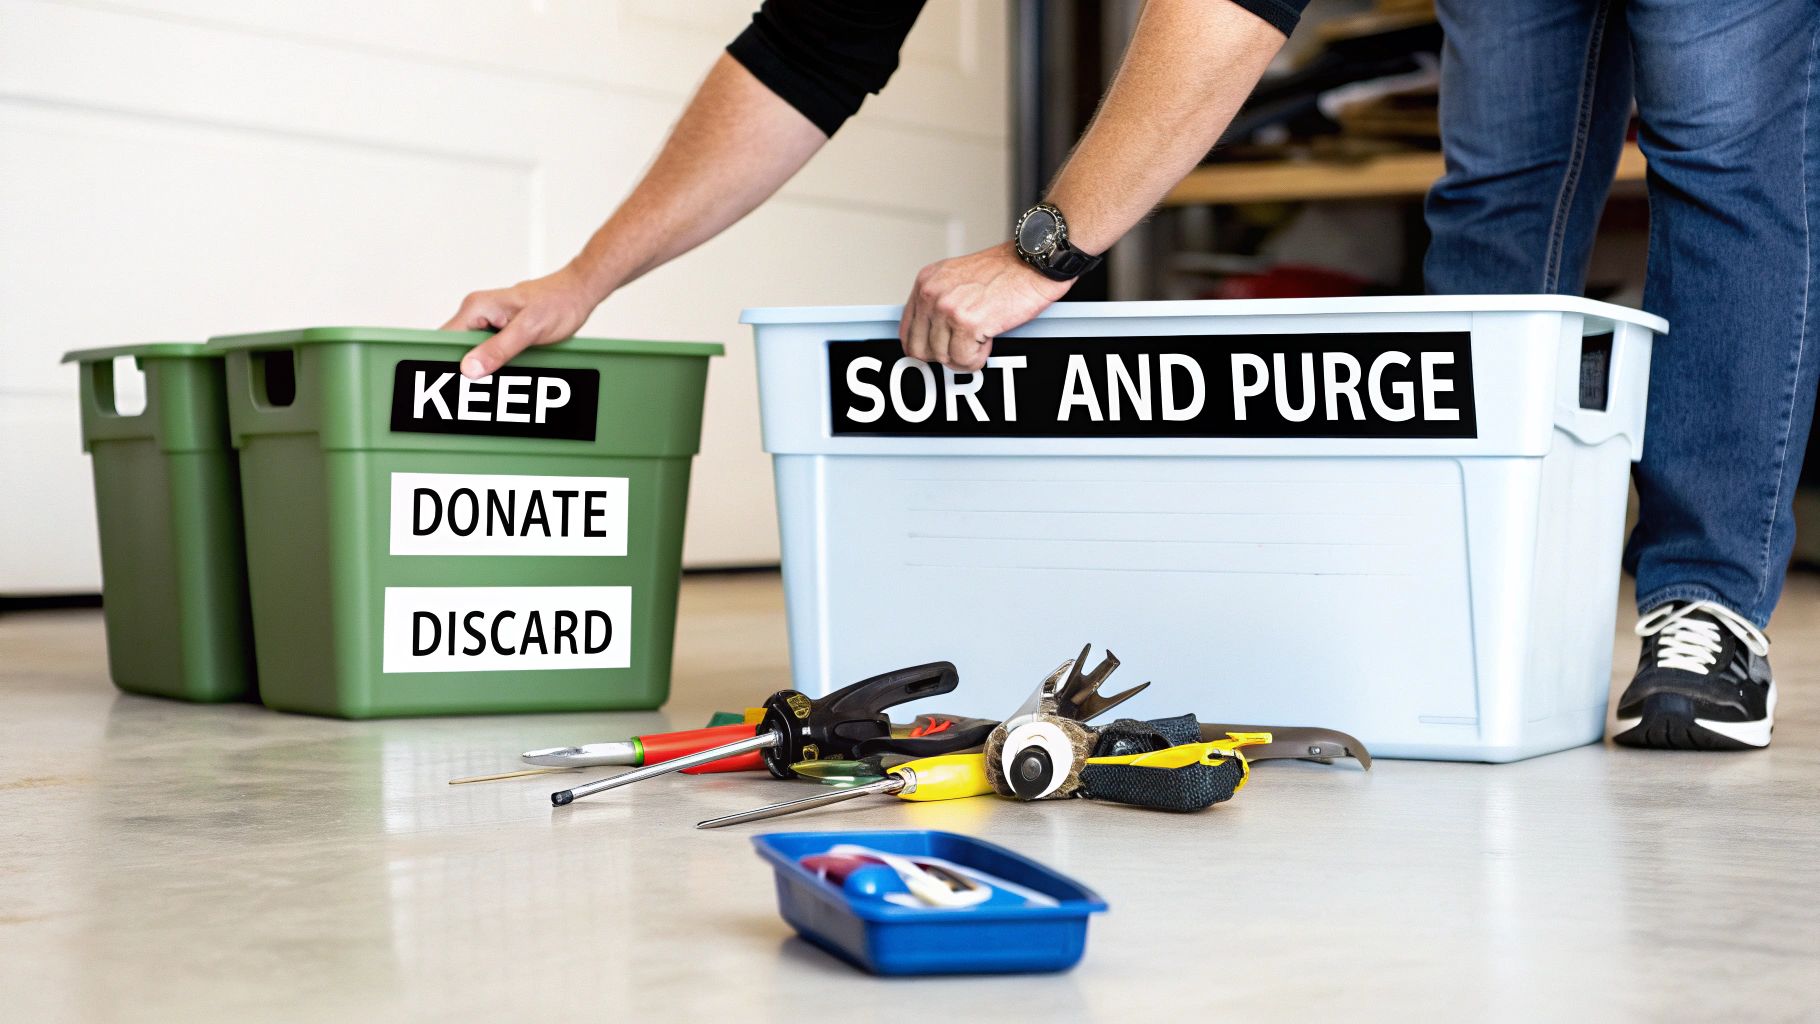
The Three-Bin Method: Keep, Donate, and Toss
To keep from getting paralyzed by the mess, set up three large bins or mark out three zones on a tarp. Label them: Keep, Donate/Sell, and Toss. This system forces you to make a decision on every single item.
- Keep: For tools you actually use. If it's in good shape and you’ve used it in the last year, it’s a keeper. Be honest about those "someday" projects.
- Donate/Sell: For functional but redundant tools. If you have three identical hammers or an old wrench set you upgraded from, let someone else put them to good use.
- Toss: For broken, dangerously rusted, or obsolete items. That drill with the frayed cord? It’s a hazard. Get rid of it.
This isn't just about decluttering. It's about curating a lean, effective collection of tools that are right for the jobs you actually do.
Sort Smarter, Not Harder
Now, sort your "Keep" pile into logical groups. This is the blueprint for an efficient workshop. Don’t just throw all the screwdrivers in one bucket. Think about how you work and group items in a way that makes sense for your projects.
Here are a few actionable methods for sorting:
- Group by Task: Create "go-kits" for frequent jobs. For instance, put your pipe wrenches, Teflon tape, and a basin wrench in a small bin for plumbing repairs. Create another for automotive work with your socket set and oil filter wrench.
- Group by Use Frequency: Your everyday tools—like a cordless drill, tape measure, and utility knife—should be front and center. Specialty tools you only need once a year, like a biscuit joiner, can be stored further away.
- Group by Power Source: Designate a dedicated charging station for all your cordless tools, batteries, and chargers. It keeps everything powered up and in one place. Do the same for corded power tools and manual hand tools.
By taking the time to sort with purpose now, you're setting yourself up for a much easier time when you plan the layout and select storage.
Designing a Smarter Workspace with Zones
With your tools sorted, it’s time to get them off the floor and into a layout that actually makes sense. The key to an organized garage isn't just finding a spot for everything; it's about creating dedicated zones for specific tasks.
Think of your garage as a collection of mini-workshops. This “zoning” approach separates a cluttered garage from an efficient workspace. The goal is to set things up so you aren't walking back and forth a dozen times for a single project. Everything you need should be right where you need it.
Mapping Your Garage Zones
Action Step: Grab a piece of paper and sketch out your garage's layout. Mark the doors, windows, and power outlets. These are your anchors. Now, think about the activities you perform in your garage. Are you a woodworker, a car enthusiast, or a gardener? Each of these deserves its own dedicated zone.
Here are common zones to plan for:
- The Primary Workbench: This is your mission control. Place your most-used hand tools within easy reach here. Use a pegboard or magnetic strip for screwdrivers, pliers, and wrenches right above the bench. Ensure this area is well-lit.
- Power Tool and Charging Hub: Group all your cordless tools—drills, saws, sanders—in one spot. Set up a dedicated shelf with a power strip to create a central charging station. This simple move ensures your tools are always ready to work.
- Automotive and Repair Area: If you work on vehicles, keep your socket sets, jacks, creepers, and oil pans together. The best spot is usually right near the main garage door.
- Gardening and Yard Work Corner: Give long-handled tools, bags of soil, and pots their own home. Use wall-mounted racks to get rakes and shovels off the floor, which instantly makes the space feel bigger and safer.
By creating dedicated zones, you’re not just organizing items; you’re organizing your actions. This approach transforms your garage from a place where you store things into a space where you get things done.
Leveraging Every Inch of Space
Once you have your zones mapped out, look up. Your walls and ceiling are prime real estate for storage. Most people forget about the vertical space they have, but it's a game-changer for organization.
The strategy is simple: match storage height to use frequency.
Your go-to items—the drill, your favorite socket set, the tape measure—should live between your waist and shoulder height. This is your "grab-and-go" zone. Items you use less often, like a router, can go on a lower shelf or in a cabinet.
For infrequent items like holiday decorations or camping gear, use high shelves or overhead ceiling racks. They keep seasonal items secure and out of the way, freeing up valuable floor space. This principle of mindful placement is also a key part of choosing useful gadgets for daily life.
Choosing the Right Storage for Every Tool
This is where your organization plan comes to life. Once you’ve sorted your tools and mapped your zones, selecting the right storage is the final piece of the puzzle. The trick is to avoid a one-size-fits-all solution; the best systems mix and match different types of storage to fit your tools and workflow.
While traditional cabinets and shelves make up about 55% of the market, wall organization systems are seeing 12% annual growth. Why? People are realizing the power of vertical space. A smart layout using pegboards for go-to tools can cut search time by up to 40%. That’s a huge deal for the 62% of DIYers who waste time every week just looking for the right tool. You can see more data in this garage organization and storage market analysis.
This decision tree helps you match tools to the right storage zone based on how often you use them.
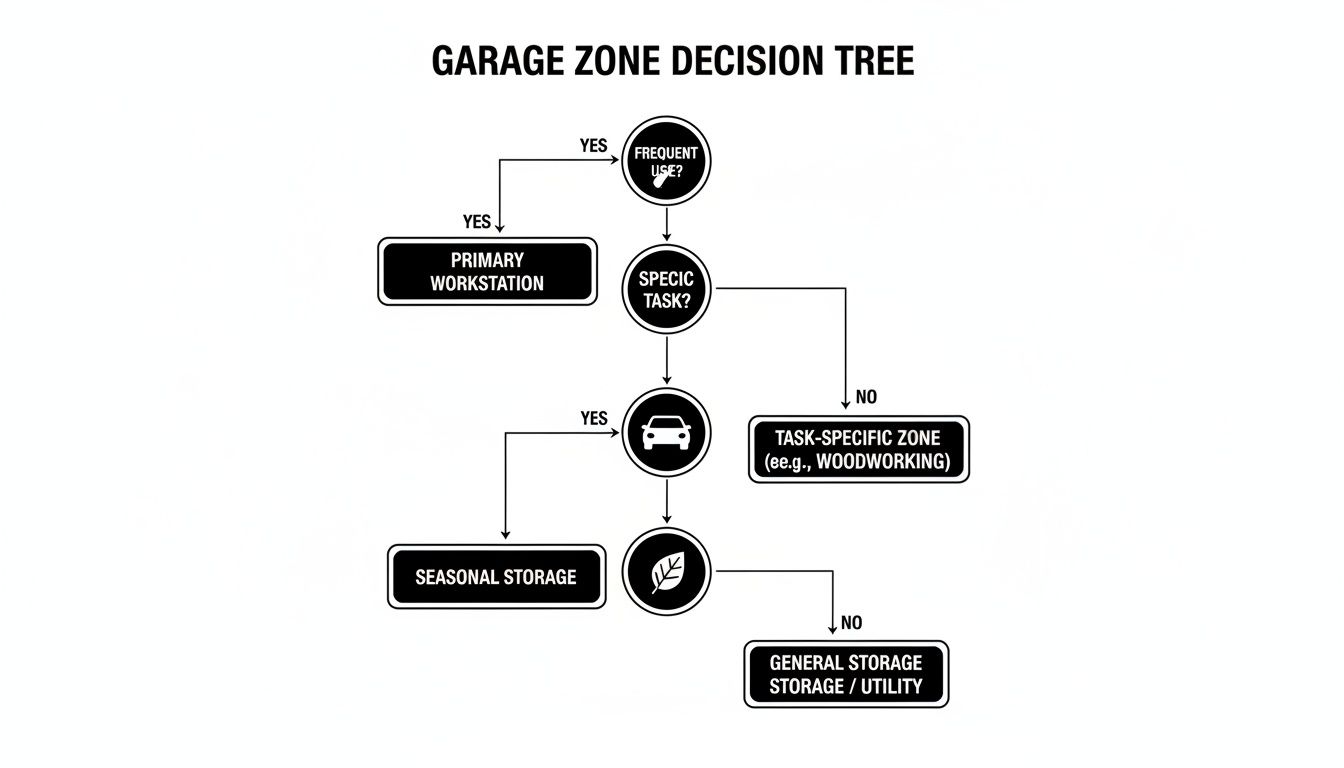
The main takeaway is simple: your most-used tools need to be out in the open and easy to grab. The seasonal or project-specific stuff can be tucked away.
Vertical Storage: Your Wall's Best Friends
Getting tools off the floor and onto the walls is the fastest way to make your garage feel bigger and more organized. Vertical storage is perfect for the tools you reach for constantly, keeping them visible and within arm's reach.
- Pegboards: A classic for a reason. Pegboards are fantastic for hanging hand tools like hammers, pliers, and wrenches over your workbench. They're incredibly flexible—you can rearrange hooks anytime your tool collection changes.
- Magnetic Strips: A game-changer for anything metal. Mount one above your workbench for instant access to screwdrivers, wrenches, and drill bits. It's the most efficient way to keep small, easily lost items visible.
- Wall-Mounted Racks: For long-handled tools like rakes, shovels, and brooms, dedicated wall racks are a lifesaver. They grip the handles securely, keeping everything neat and flush against the wall instead of in a tangled, trip-hazard pile.
While essential, vertical systems are just one part of a complete setup. For more ideas, explore our list of the best home organization products, which features smart solutions for any cluttered space.
Cabinets, Carts, and Bins
While wall storage is great for visibility, some tools need more protection, security, or mobility. This is where enclosed storage and rolling carts come in.
The best garage tool organization systems blend open, accessible storage for daily drivers with secure, enclosed storage for valuable or less-frequently used items. It's all about creating a balanced ecosystem.
To help you decide what's right for your space, here's a quick comparison of the most common storage solutions.
Tool Storage Solutions Comparison
| Storage Type | Best For | Pros | Cons |
|---|---|---|---|
| Pegboards/Wall Racks | Everyday hand tools, long-handled garden tools. | Highly visible, customizable, saves floor space. | Limited weight capacity, can look cluttered if not maintained. |
| Lockable Cabinets | Expensive power tools, hazardous materials, items needing dust protection. | Secure, protects from dust/moisture, clean look. | Can be expensive, less accessible for quick grabs. |
| Mobile Tool Carts | Project-specific tool sets, automotive work. | Portable, keeps tools for a job in one place. | Takes up floor space, limited capacity. |
| Clear Bins & Totes | Small parts, accessories, project supplies (screws, plumbing parts). | Stackable, easy to see contents, affordable. | Requires disciplined labeling, can get heavy. |
A combination is almost always the answer. Many people use a large cabinet for power tools, a rolling cart for mechanic's tools, and a large pegboard for everything else used weekly.
Consider incorporating these options into your layout:
- Lockable Cabinets: If you've invested in power tools, a sturdy, lockable cabinet is a no-brainer. It protects your expensive gear from dust and moisture and adds a critical layer of security, keeping them safe from theft and away from children.
- Mobile Tool Carts: For anyone who moves around the garage for different projects—especially car repairs—a mobile tool cart is indispensable. Load it with everything you need for a specific task and roll it right to your side, saving trips back to the workbench.
- Clear, Labeled Bins: Never underestimate a simple bin system. Use clear, stackable bins to group all small items—sanding discs, plumbing fittings, electrical supplies. Action Step: Label every bin. It’s the only thing that stops neat stacks from becoming a frustrating guessing game.
The Secret to Keeping Your Garage Organized for Good
You've done the heavy lifting—sorting, zoning, and installing. Now, the real test is keeping it that way. A pristine garage is only useful if it stays that way, which comes down to building a few simple habits.
The single most powerful habit is the 'one-touch rule': when you finish using a tool, put it away immediately. Don't leave it on the workbench for "later." This one action is the cornerstone of a permanently organized space.
Know What You've Got: A Simple Inventory
Actually knowing what you own stops you from buying a third hammer because you couldn't find the other two. Creating a basic inventory doesn't have to be a complex project.
- Go Digital: Use a simple Google Sheet or Excel file to list your main tools, their location, and warranty info.
- Use Your Phone: A checklist in a notes app works great. Before a hardware store run, a quick search confirms whether you actually need those new pliers.
- Keep it Analog: A laminated checklist hanging on a clipboard works just as well.
A simple tracking system saves money and frustration by preventing duplicate purchases, a primary source of garage clutter.
Sustaining an organized garage isn't about one massive, annual cleanout. It's about the small, consistent actions you take every day that eventually become second nature.
An Organized Garage is a Safe Garage
A tidy space is naturally safer, but a few specific habits are essential. Action Step: Always keep walkways and the floor around your workbench completely clear. Floor clutter is one of the biggest trip hazards, especially when you're carrying something heavy.
Beyond that, build these checks into your routine:
- Secure Your Storage: Double-check that heavy shelves and racks are bolted securely into wall studs, not just drywall. A collapsed shelf is a preventable disaster.
- Handle Sharp Tools with Care: Store blades, chisels, and saws with their protective covers on or blades retracted. Give them a designated home in a drawer or holder—never leave them loose on a bench.
- Do a Quick Monthly Inspection: Once a month, take five minutes to look over your equipment. Check for frayed power cords, cracked handles, or any other signs of wear that could make a tool unsafe.
These aren't just chores; they're the final pieces that turn your organized space into a truly functional and safe workshop for years to come.
Answering Your Biggest Garage Organization Questions
Even with the best plan, you will hit a few snags. Over the years, I've heard the same questions come up repeatedly from homeowners in the thick of organizing. Let's tackle some of those common hurdles right now.
What’s the Most Cost-Effective Way to Start Organizing My Tools?
The cheapest way to start is by focusing on what you can get rid of, not what you can buy. The first and most effective step costs nothing: decluttering. Go through everything and be ruthless about what you don’t need. You'll be amazed at how much space opens up before you've spent a dollar.
After that, get creative with repurposing. Old coffee cans or mason jars are perfect for holding screws and nails. Scrap wood can become simple shelves for paint cans or storage bins.
When it's time to buy something, think vertical and think cheap.
- Pegboards: These give you the most bang for your buck. For a small investment, you can turn an entire empty wall into efficient storage.
- Magnetic Strips: You can get a good one for under $20, and it's a game-changer for keeping frequently used wrenches, screwdrivers, and drill bits visible and accessible.
Resist the urge to splurge on a giant cabinet system right away. Start small with these high-impact solutions and build out your system as your budget allows and your workflow becomes clearer.
How Should I Store Large or Awkwardly Shaped Tools?
Bulky, odd-shaped tools are often the main cause of floor clutter. The trick is to get them up and off the ground with a specialized approach.
For long-handled tools like shovels, rakes, and brooms, use a wall-mounted rack with spring-loaded clips. These grip handles of different sizes, holding everything securely against the wall and eliminating trip hazards.
For a heavy-duty power tool like a table saw or a planer, a mobile base is a fantastic investment. It lets you tuck the machine against a wall when not in use, freeing up floor space. When you need it, simply roll it out into the open.
Finally, don't just lean ladders against the wall. Action Step: Use a simple pair of heavy-duty wall hooks to hang them horizontally, safe and out of the way.
The goal for awkward items is simple: get them off the floor. Whether it's on the wall or on wheels, reclaiming that floor space is a huge victory in the battle against clutter.
How Can I Stop My Garage from Getting Cluttered Again?
Keeping your garage organized is about building good habits. A perfect system is useless if you don't use it. The secret is making it easy to maintain.
First, live by the ‘one in, one out’ rule. When a new tool comes into the garage, an old, broken, or redundant one must leave. This simple policy is your best defense against the slow return of clutter.
Second, adopt the mantra: ‘put it away, not just down.’ The second you're done with a tool, return it to its designated home. This one habit is the single most effective way to prevent piles from forming on your workbench.
Finally, schedule a quick 15-minute "reset" once a month. This isn't a deep clean. It’s a quick sweep to put away anything that was left out and to wipe down your main work surface. This small, regular tune-up is much less intimidating than a massive annual cleanout and keeps your garage ready for action.
At JonkeyCart, we believe that a well-organized home makes life easier and more enjoyable. From clever storage solutions to practical gadgets, we curate products that solve everyday problems. Discover smart, affordable items to enhance your home and workshop. Explore the JonkeyCart collection and find your next favorite tool today!
Article created using Outrank


Leave a comment